Android on the Digi ConnectCore Wi-i.MX51
Android is an interesting platform for embedded devices of many types, not just phones. There are ports for various development boards, including the Beagleboard. To get an idea of how easy it is to implement on a new platform, I ported it to the Digi Wi-i.MX51 Jumpstart board which I reviewed earlier (see http://www.embedded-linux.co.uk/hardware/ccwi.imx51). I will post full details to Inner Penguin later. In this article I just want to show the end result.
Features that work in the current version of the port include
- touch screen
- serial port - for console messages
- USB, e.g. for a keyboard
- Ethernet
- SD card
Not working/not tested
- sound
- wifi
- graphical acceleration
For simplicity, I am booting off an SD card and I am putting all the Android files and data into a single partition rather than three separate ones as you would on a production system. You will need an SD card of at least 256 MiB capacity (I used a 4 GiB card). I used Ubuntu 10.04 to format the card but it should work on any Linux distribution.
Partition the SD card
You need to create two partitions:
Partition 1: at least 4 MiB with system id 6 (FAT16), for the kernel
Partition 2: at least 200 MiB with system id 0x83 (Linux), for the root file system
Create a file system of type msdos on the first partition.
Create a file system of type ext3 on the second partition.
Copy the kernel
Download the kernel image from http://www.embedded-linux.co.uk/downloads/uImage-2.6.31-ccwmx51js-android. Copy it to first partition as file "uimage".
Copy the root file system
Download the Android file system image from http://www.embedded-linux.co.uk/downloads/android-fs-2.1-ccwimx51.tar.gz. Un-tar it to the second partition.
Un-mount both partitions.
Remove the SD card and plug it into the ccwimx51 board.
Configure u-boot
Connect a serial cable to the console port on the board and start a terminal emulator (I use minicom) with a baudrate of 38400 and no hardware or software flow control.
Turn on the board and hit Ctrl-C to get to a U-Boot prompt (CCWMX51 #). Type the following, making sure that the two setenv commands are all on one line:
setenv bootargs console=ttymxc1,38400 video=displayfb:LCD wvga calibration root=0xb302 rw rootdelay=4 init=/init androidboot.console=ttymxc1

setenv bootcmd mmc rescan 1\;fatload mmc 1:1 a0000000 uimage\;bootm a0000000

saveenv
Turn off the board.
Using Android
With the SD card in the SD slot on the board turn it on. On the LCD display you should see the normal penguin logo, then the word “Android” followed by an animated Android logo and finally the Android screen.
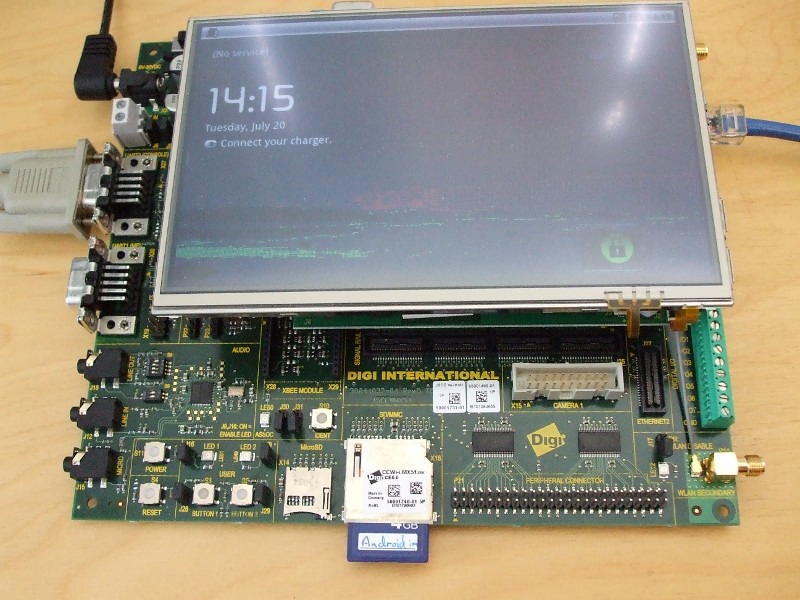
The screen is locked initially. Normally you would press the Menu button to unlock it, so I have mapped the button user marked BUTTON1 as “Menu” and also BUTTON2 as “Home”. Pressing BUTTON1 should bring you to this screen.
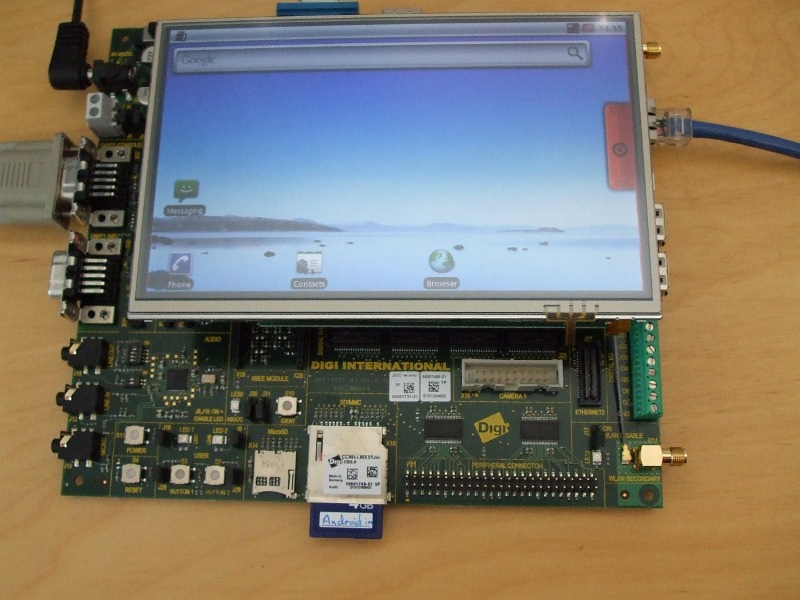
Press BUTTON2 (Home) to get back here at any time. With a combination of these two buttons and the touch screen you can navigate around most of the Android apps. Or, you can plug in a USB keyboard in which case you will find
HOME - Home
F1 - Menu
F4 - suspend/resume
Cursor keys - as you would expect
You can access the network via Ethernet: it will attempt to contact a local DHCP server as it boots up and configure the network from that.
You can get a root shell either via the serial terminal, or if you have a copy of adb (Android Debug Bridge) by typing
adb connect [IP address of the board]:5555
adb shell
Enjoy!
 Twitter
 GitHub